How to change boot priority order in windows?
Are you facing difficulties installing or upgrading the OS? Can’t you even enter the “BIOS” to change the boot priority order? It often happens especially installing from Pen-drive or External Devices.
In this article, we will discuss “How to access or enter BIOS settings and How we can change the boot priority order.”
How to Enter BIOS Settings of Your PC?
To change your “Boot Priority Order,” you have to enter the “BIOS Settings” first. Entering the BIOS settings is a tricky process. Follow our guidelines to enter the BIOS setting safely.
Before proceeding to the BIOS settings, we must know some essential information about the computer. Computer operation has built-in tips or information for its users (“Computer will automatically guide you through the process.”)
All we have to understand is what or where to find it. Keep your eyes open to find the tips on notices provided by your PC.
OK, now let’s go to the process of entering or accessing the BIOS settings: The processes are-
- Restart your PC.
- Beware of time as you will get 10 seconds to access your PC’s BIOS setup.
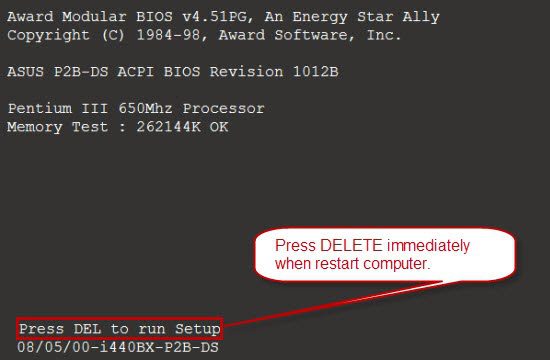
- Press “F2,” “DEL,” “Esc,” “F9,” or “F12” to access settings. ( Key may vary according to your PC or BIOS vendor.)
- Wait till your BIOS or CMOS settings appear.
Here the tips for you “Press DEL to run Setup” ( DEL = Delete )
What to know about the BOOT?
The most important thing about “Change Boot Priority Order” is that, you have to know “BOOT” first.
- BOOT is the windows load function from where your Computer’s Windows runs.
- The Start of the Computer searches the “Boot Devices” to load.
- Your Boot Device is your HDD. ( Specifically: C: Drive, where windows are installed )IfF you want to install a new then, you need a “Boot-able CD/ DVD.”
- Remember: If the computer finds a “Boot Option”, It will never search for another.
Why you can’t find your BOOT devices on Windows Startup?
If you able to boot from your Hard Disk Drive, and needs to change your OS or wants to perform a Clean Windows Install, but can’t find your CD / DVD / Pen drive to BOOT. It is because your Boot Device is Set to “HDD.” Your computer will never search for other boot options if it finds the “First Boot Device” active. [Hence you set your HDD as first boot device]
When your Boot Fails only, you will get a message: “Boot Device not detected.” If so, please perform the following actions-
- Check your CD / DVD cable to ensure it is plugged in properly with the motherboard.
- Or, insert your pen drive into your PC.
- If everything is OK, then go for change the “BOOT Priority Order“.
For UEFI Boot Priority Order in PCs like HP, you can follow the article of HP about changing the boot order.
How to Change Boot Priority Order?
- To change your BOOT Priority Order, enter BIOS / CMOS setup.
- Now, Go to the “BOOT” tab.
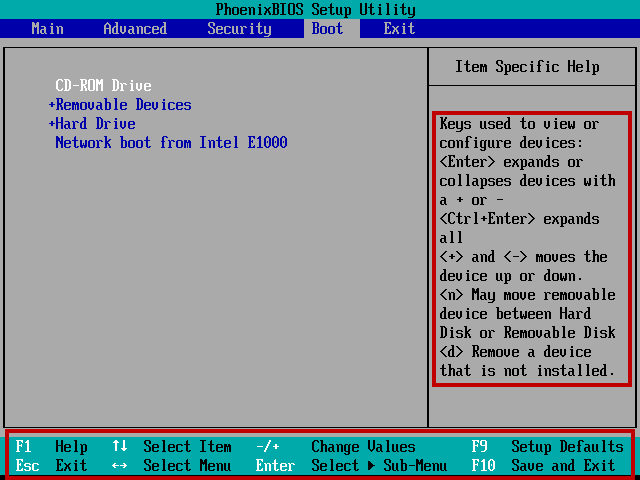
- In the BOOT tab, you will find your BOOT priority order.
Example 1: Look carefully in the picture above, here the BOOT orders are-
-
- 1st Boot Device: CD-ROM Drive
- 2nd Boot Device: Removable Device
- 3rd Boot Device: Hard Drive
- 4th Boot Device: Network Boot
If you insert your Windows CD / DVD into your CD-ROM Drive, you can Boot from it as it is set as “First Boot Device.”
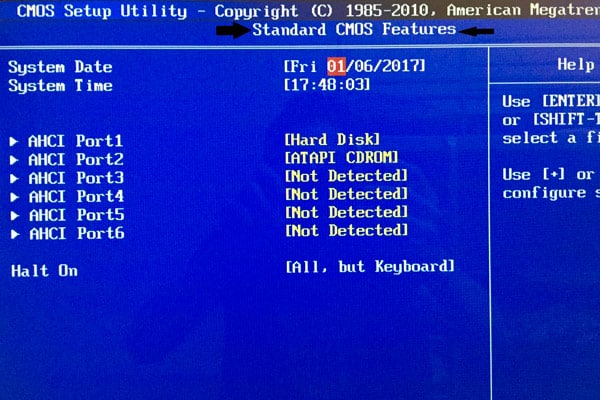
Example 2: Look Carefully: Some computer Boot Order can be like below:
- 1st Boot Device: Hard Drive
- 2nd Boot Device: ATAPI CD-ROM.
(If your BOOT order is like above, you can’t boot from CD-Drive directly without changing your BOOT order like example 1)
Changing Your Boot Priority Order
The instruction is given in the “help information tab” of your BIOS window. To change Value:
- + or – to move the device up or down.
- Use the up and down arrow to select the device.
Saving The Current Settings
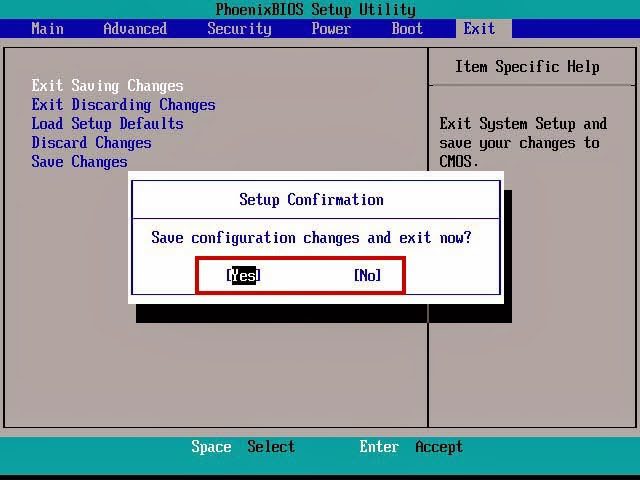
It is very important to “Save the Settings” before you restart the windows. If you don’t save the setting, your change will be lost. To save the change you made in your BIOS, press “F10“, and a message will appear like the picture below-
Now Press “Enter”, selecting “Yes.” That’s it! You have successfully changed your BIOS BOOT order.
Conclusion
Boot order changing is a little bit tricky and risky work. But if you follow the steps above, you will find it easy to change the boot order. Thanks for reading the full article “How to change the boot priority order“.
If you need to refresh your PC in one click, you can read our blog post of “How To Refresh A PC By 1 Click Using Refresh.bat Easily.”

