How to Perform the Windows 8 System Restore Easily?
Sometimes we faced serious problems with our Windows. We can do nothing but have to perform a System Restore. This article will help you to do a “Windows 8 System Restore” with only 8 clicks.
Table of Contents
What is a System Restore?
System restore is a process of windows by that you can go to the past “Last Known Good Configuration” time; Where you found your windows was working without any problems.
Your computer will create a “system restore point” of specific time; By selecting the date and time from System Restore window, you can restore your affected windows to that particular time.
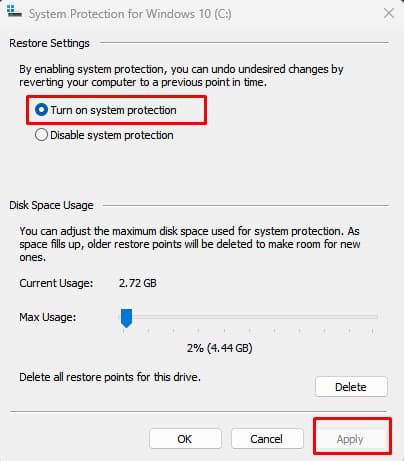
Note: “System Restore Point” must be enabled in your drive C: to let windows create a restore point automatically.
To enable “Windows 8 System Restore” point,
- Go to the “System Restore Window” (How to open System Restore Window)
- Select Drive C: from the list given.
- Click on “Configure” button below.
- Click on “Turn on System Protection”
- Apply and Save.
How to Perform a System Restore in Windows 8?
To perform a Windows 8 system restore is very easy. Just follow the 8 steps below to do it.
Opening The System Restore Window
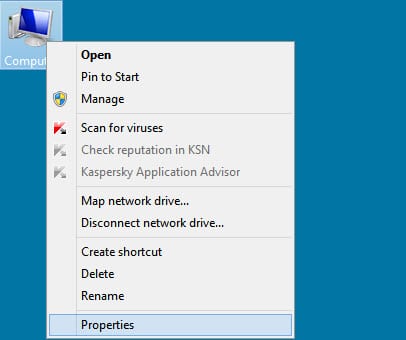
To open the system restore window, Right click on your “Computer Icon” from the desktop and select the “Properties” option from the bottom of the context pop-up menu.
A new window will appear named “System”, all you have to do is, slecting the “System Protection” option from the left side and opening the System Properties Window.
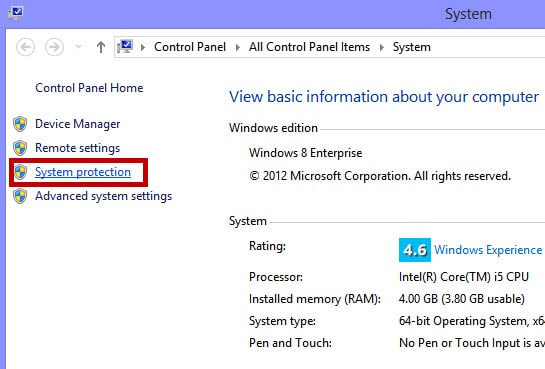
This is how you can open the “System Properties” window to perform the additional actions.
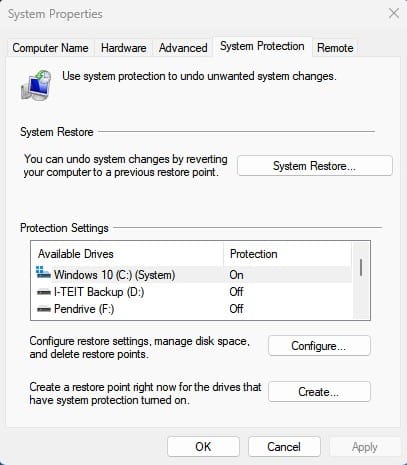
In System Properties window there are 5 tabs; Computer Name, Hardware, Advanced, System Protection, and Remote tabs. We need to work on the System Protection window for Windows 8 System Restore.
Performing a System Restore
In the “System Protection” tab, you will find a “System Restore” button under the System Restore options. All you have to do is, just click on it to start the “System Restore” actions.
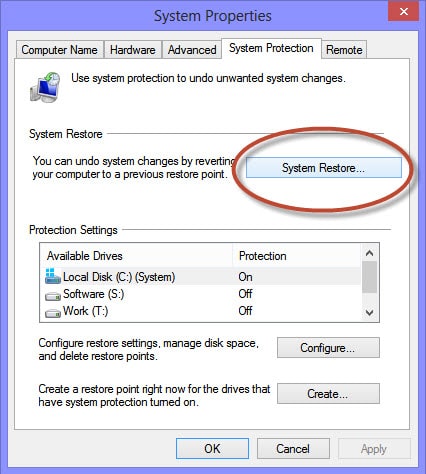
Once you heve clicked on the “System Restore” button, your PC will start the system restore option from now on with few simple steps. Carefully go ahead with the right informations as we mentioned next. Now click on the “Next” button for the second steps.
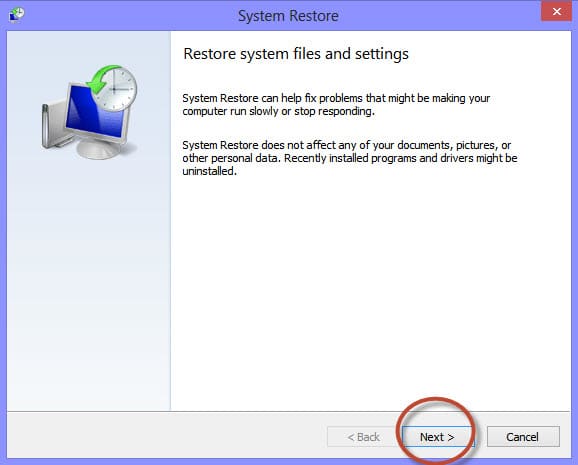
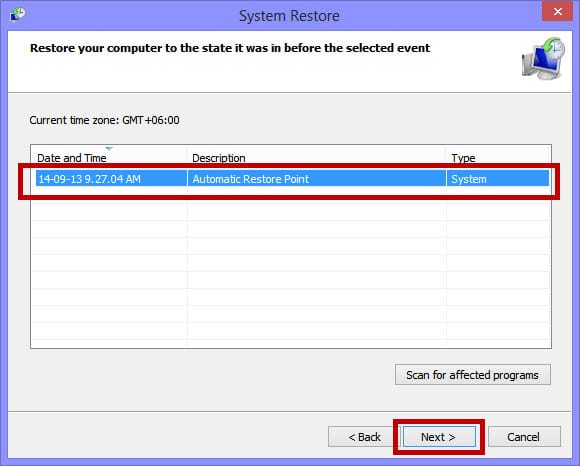
The most important part of this process is starting now. You have to select the correct “Restor Point” from the lists in the system restore window.
If you can remember the time and date then your PC was running OK, then select that row by clicking on it.
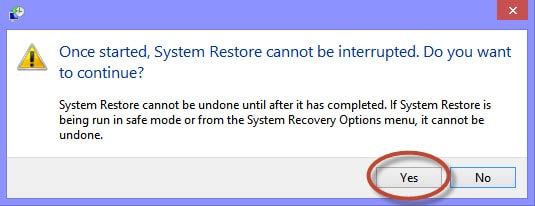
Now you have to click the “Finish” button to start the system restoring process as you have selected earlier. You will be promped to make sure that all the action you done is ok like this “Once started, System Restore cannot be interrupted. Do you want to continue?“
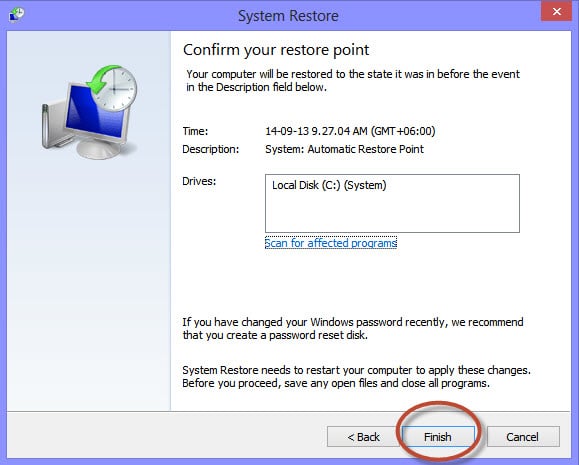
So, be careful about all the actions you have made before. Once the system restoration process will start, you cannot revert it. Or you cannot shutdown your PC. If you shutdown your PC forcefully during this period, Your HDD might permanently got damaged.

The system restoration process is running now. Your PC will take some time to complete the restoration process, so be patient while your PC continues the System Restore.
After successfully completing the restoration, your PC will automatically restart. Wait for a restart and the system will show you the “Success Massage” after restarting your PC.
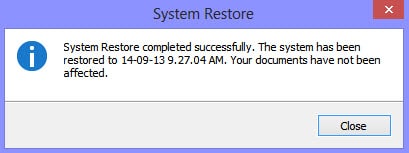
If you need more Windows 8 related help, you can visit our “Windows 8 Category Page.”


![How to enable "Dot net framework 3.5{include 3.0 and 2.0} without internet [OFFLINE]? 14 How to enable “Dot net framework 3.5{include 3.0 and 2.0} without internet [OFFLINE]?](https://windowstechnics.com/wp-content/uploads/2013/08/Microsoft-dot-Net-Framework-4-300x286-1-1024x976.jpg)

