A simple way to hide a specific (System Reserved) partition in windows 7
There has been a problem with the specific partition / System Reserved partition for some Windows 7 users often. It shows nothing in it but is visible in the “My Computer” area. Today we’ll know how to hide it without any software……
After installing windows 7 it is disgusting to see system reserved partition in “Computer”
Searching the way to hide your unwanted / specific partition…..
OK! Let’s start…
First : You have to understand how your computer categorically show your drives / partitions in “Computer”. There are many way you can make a custom show your drives / partitions which can be handled with “View Tab” after opening your “My Computer”.
Here you can see 3 options : 1. View 2. Short by 3. Group by
Important to know is your “Drive Latter” It is responsible for these change you make to view your drives / partitions in different views.
Second : Find the “Drive Latter” of your specific drive. You’ll have to do some work with your drive latter after some times.
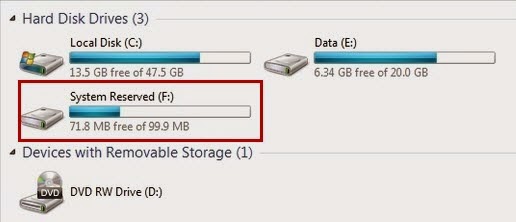
Your “Drive Latter” of specific drive look likes some “D” / “E” / “F” or else shown in the picture below:
Here the drive latter is “F”
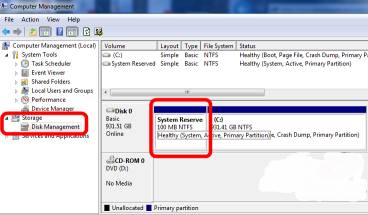
Third : Now open “Run” command by pressing “Win logo + R” and write this code in it “diskmgmt.msc” and press enter. You can see your disk management window will now appear.
Fourth : Now carefully do as I say,
- Right click on “Specific” drive
- Click on “Change Drive Latter Or Path”
- Select the “Drive Latter” on the box
- Click on “Remove” below
Now there is no drive latter for that “Specific” drive….
Fifth: Restart your computer and you can see your “Specific Drive” has gone……..
Enjoy !!!
Thank You..

